

Before laying fresh asphalt, proper ground preparation is critical. A well-prepared surface is the foundation of long-lasting, durable asphalt paving. Whether you’re building a residential driveway or developing a commercial parking lot, ground preparation plays a major role in the performance and longevity of your pavement. This guide will walk you through each step involved in asphalt paving preparation, from clearing the site to grading, compacting, and installing the sub-base.

Why Ground Preparation Matters
The majority of asphalt failures, such as cracks, potholes, surface sinking, and drainage issues, can be traced back to improper groundwork. No matter how good the asphalt mix is, it will not perform well or last long if the base it sits on is weak, uneven, or poorly drained.
Proper ground preparation ensures:
- Long-term structural stability
- Effective water drainage
- Resistance to shifting and settlement
- Even load distribution under traffic
- Enhanced surface smoothness and appearance
In short, skipping or rushing this step leads to costly repairs and early pavement deterioration. That’s why professionals place so much emphasis on careful preparation.
Step 1: Site Clearing and Inspection
Every successful paving project begins with a clean, unobstructed work area. This involves removing any grass, roots, old asphalt, debris, rocks, or construction waste from the surface. Clearing the site allows the contractors to work on a fresh canvas and prevents any hidden materials from interfering with the paving layers.
Once cleared, the area is thoroughly inspected to evaluate:
- Existing soil conditions (type, moisture, density)
- Slope and drainage issues
- Potential low spots or unstable areas
- Need for reinforcement (e.g., geotextile fabric)
This step helps determine whether the soil needs to be replaced, stabilized, or compacted further, and whether drainage adjustments or slope corrections are necessary.

Step 2: Grading for Proper Drainage
Grading is the process of leveling and shaping the ground to promote proper water runoff. Water is one of the most damaging elements to asphalt. If it sits under the surface or forms puddles on top, it can weaken the pavement and accelerate cracking or erosion.
To avoid these issues, contractors create a slight slope during grading, typically 1% to 2%, to direct water away from the pavement surface. This slope is barely noticeable to the eye but critical for long-term performance. Special attention is given to ensure the grade leads toward existing storm drains or designated runoff areas.
The grading process often uses heavy machinery like graders or skid steers to move and shape the soil evenly across the area.
Step 3: Compacting the Soil
After grading, compacting the soil is the next vital step. Soil compaction involves pressing down the ground using mechanical equipment like vibratory rollers or plate compactors. The goal is to eliminate air pockets and increase soil density.
Why is this important? Because loose or soft soil can settle unevenly after paving, leading to surface depressions or even cracks. Compaction strengthens the subgrade, the soil layer beneath the pavement, so it can better handle traffic loads without shifting.
In areas with clay, sand, or highly moisture-retentive soils, additional attention is required. Sometimes, soil stabilizers or replacement with granular materials is necessary for improved performance. If the soil remains unstable even after compaction, geotextile fabric may be installed as a stabilizing layer.
Step 4: Installing the Subgrade and Base Layer
The subgrade is the compacted soil foundation, but it’s not enough on its own. To add more strength and load-bearing capacity, a base layer is installed above it. This layer typically consists of crushed stone, gravel, or recycled aggregate material.
The base layer performs several key functions:
- Supports traffic loads
- Protects the subgrade from water penetration
- Spreads weight evenly across the surface
- Prevents surface deformation like rutting and potholes
The thickness of the base layer depends on the type of project:
- Residential driveways: 4–6 inches
- Commercial lots or roads: 6–8 inches or more, depending on expected traffic weight
Each layer of the base material is also compacted in stages to ensure maximum density and strength. Weak or loose base material leads to premature failure of the asphalt surface, so this step is never skipped.

Step 5: Final Grading and Fine-Tuning
Once the base layer is in place, the final grading phase begins. This step involves carefully shaping and leveling the surface to eliminate any dips, bumps, or irregularities. Contractors also re-check the slope to ensure proper water runoff.
Final grading is a precision process that may involve laser-guided tools or string lines for accuracy. The aim is to create a flawless surface that’s perfectly ready for asphalt placement.
This is the last chance to correct any imperfections before the asphalt is installed; after this point, changes become difficult and expensive.
Step 6: Applying a Binder Layer (Optional)
In some paving jobs, particularly commercial or industrial projects, a binder layer is added between the base and the final asphalt layer. This binder layer is a mix of large aggregate and bitumen, designed to enhance durability and bonding.
The binder helps:
- Absorb heavy traffic stress
- Add structural integrity
- Bond the base to the top asphalt layer
While not always necessary for light residential jobs, it’s a worthwhile investment for high-traffic areas or locations where longevity is critical.
Step 7: Ready for Asphalt Installation
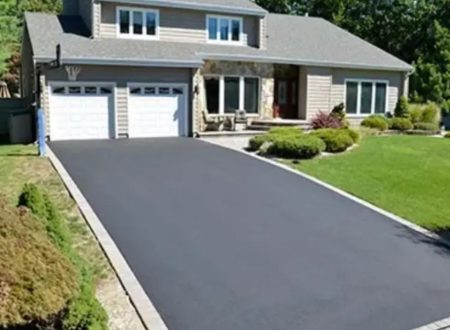
With the base and binder layers compacted and shaped, the site is finally ready for asphalt paving. The surface at this point should be firm, smooth, and properly sloped. Asphalt can now be laid evenly, allowing for a strong bond and smooth finish.
Proper preparation ensures that the asphalt cures uniformly and adheres tightly to the foundation; two essential conditions for long-term pavement success.
Why Choose Texas Asphalt for Your Paving Project?
At Texas Asphalt, we believe a strong surface starts from the ground up. Our experienced crews specialize in thorough, professional ground preparation for asphalt paving. From soil assessments to precise grading and compaction, we do it right the first time.
We provide:
- Comprehensive site clearing and inspections
- Accurate grading and slope adjustments
- Industry-approved compaction techniques
- High-quality subgrade and base materials
- Custom solutions based on soil type and traffic volume

FAQs About Asphalt Ground Preparation
Q: Can I skip compaction if the soil looks firm?
A: No. Even soil that appears stable may shift under the pressure of vehicles and weather changes. Compaction is essential to prevent future settlement and surface failure.
Q: What’s the ideal slope for drainage?
A: A 1% to 2% slope is typically recommended to ensure water flows away from the pavement and doesn’t collect in low areas.
Q: Do I need a geotextile fabric under the base layer?
A: Not always. It depends on the soil type and moisture levels. In areas with weak or wet soils, geotextile fabric helps stabilize the base and prevent it from mixing with the soil.
Q: How long does site prep usually take?
A: For small projects like driveways, 1–2 days is typical. Larger commercial jobs may take up to a week or more, depending on site conditions and complexity.
Q: Can poor prep really cause early asphalt failure?
A: Yes. The majority of pavement issues stem from inadequate groundwork. Cutting corners during preparation will lead to costly maintenance or premature resurfacing down the line.
With our commitment to detail and quality, you can trust us to build a surface that’s smooth, strong, and made to last.
Ready to start your project?
Contact Texas Asphalt today and get expert ground prep services you can rely on.

308 Comments